I've never made any furniture before, but I wanted to make a gift for my parents - especially after they let me build a shack on their property. The logs were harvested from around the property, and I splurged on some cedar boards so they'll last for years to come. Don't worry, I'll debark them before too long!
It was hard to figure out what dimensions would work, but after doing a number of google searches, I came up with these numbers. I know - being Canadian - I should probably be using metric measurements like centimeters, but I prefer to use the imperial inches (easier numbers to work with). I didn't take any pictures during the construction of the bench, but I did take a few while making the chair.
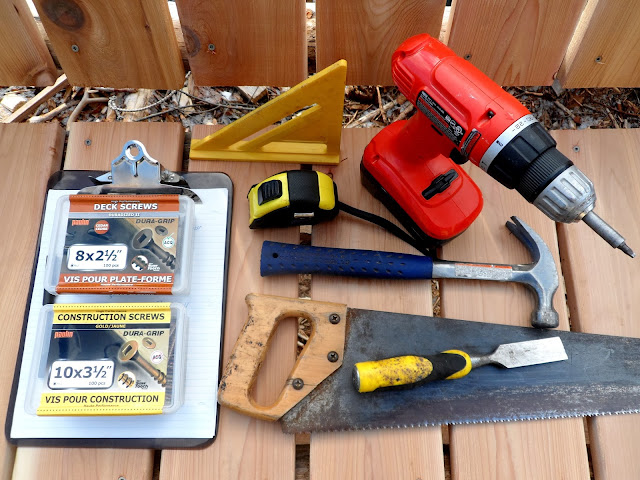
These are the tools I used (missing from the picture is a level). I used 2 1/2" deck screws to attach the cedar boards to the logs, and 3 1/2" construction screws to attach the logs together.
The only difference between the chair and bench are the logs that go lengthwise (the chair being 30" and the bench being 66"), and small differences in the length of boards. The back logs were cut at 40", and the front ones at 23".I generally eye-ball these cuts. This particular log (18") will be the middle piece connecting the front leg to the back one. I generally start my cut about 1 1/2" from the edge of the log, and cut down approximately the same distance to where I've drawn a line across the log. And that's my dog!
Once I've made both cuts, I notch out the remaining chunk of wood with a hammer and chisel.
Not perfect, and there's probably a better way to do this, but it works!
Now I need to make notches in the legs of the chair, so that the previous log can slide into it snuggly. I measure from the ground-up 16", and make a marking with the saw.
Then I hold the notched connecting log against the line, and make a marking on the opposite side. I cut down into the log approximately 1 1/2" on both markings, and then chisel the remaining chunk of wood out.
Presto. It could have been a little snugger, but that should do just fine.
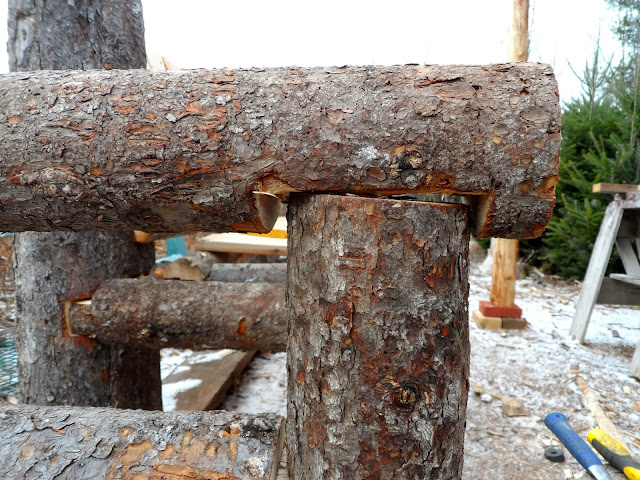
Now comes the arms of the chair. The original length of those are 23" - enough so it will completely cover the top of the front legs of the chair. I notch the back of the arm so that it will slide into the back leg of the chair. To make the notch on the back leg, I measure up from the ground 25", hold the notched out arm-log against the back leg-log, and make another marking with the saw (exact same thing I did previously).I notched out the bottom part of the arm, so that it will come down level on top of the chairs front leg.
I cut four 30" long logs, with a diameter of about 3", to connect the sides of the chair together. They will also be the base for the seat and back boards.
I removed parts at both ends of the logs so that they would lay flat.
I removed parts of wood from the legs of the chair, so that the connecting cross-pieces would have something to fit snuggly against.
For some reason I decided to finish building the the chair without taking any more pictures. After I attached the cross-pieces to the sides of the chair, I added two additional pieces to the back of the chair, so that the back support would be closer to the front edge of the chair (my mom is short, so if I attached the boards to the original set up, her feet wouldn't touch the ground!).
Side view of chair.
View from behind - here you can see the two pieces I added to the back of the chair - both of which are 20". The natural angle created by attaching the bottom cross-section to the front of the back legs, and the top cross-section to the back of the back legs, creates a comfortable sitting position. That was a mouthful.
Finished bench.
View of the shack from the western side.
I decided to tag a couple more pictures of it onto the end of this album!
Underneath the first floor.
Underneath the second floor.
Looking down the ladders, towards the front of the property.
Same shot, slightly raised.
Full view of the front of the property - my parents trailer and their newly constructed outhouse. They've gutted the inside of the trailer, so the outside looks can be pretty deceiving. They're currently saving so that they can build their dream cottage somewhere on the property.
Ladder handrails.
Full view of the back of the property. It was clear-cut four summers ago, months before my family bought the land. Since then, we've seen incredible new growth, and have planted over 400 trees at various spots around the property! It's certainly a work in progress, but also an incredibly fun and rewarding one :)


No comments:
Post a Comment